Water Brush vs Normal Brush for Beginner Artists: How to Use, Pros & Cons
Key Takeaways
- Choosing between a water brush and a regular watercolor brush comes down to personal painting habits and how much portability matters, since each style has its own strengths and limits
- A water brush stores water in a hollow handle and releases it with a squeeze, while a regular brush is dipped into a cup for every stroke
- Over-squeezing a water brush is one of the most common beginner mistakes, often leading to puddles or unwanted blooms on the page
- Regular brushes offer full water control and a wider variety of shapes for detailed work, but they need a fuller setup with a nearby water source
- Tobio's Kits explains that a water brush can also handle brush lettering, color lifting, soft gradients, and activating watercolor pencils, which is worth practicing alongside basic painting. Find more of the team's insights below
Picking a first watercolor brush can feel more complicated than it needs to be. The choice between a water brush and a regular watercolor brush usually comes down to personal painting habits and how much portability matters, since each style brings its own strengths and trade-offs to the table.
The Real Difference: How Each Brush Holds Water
The biggest distinction between these two tools is not about skill level or price. It comes down to where the water lives before it reaches the paper. A water brush stores water inside a hollow handle and releases it through the bristles with a gentle squeeze, so there is no need to keep dipping into a cup. A regular watercolor brush has no built-in water source at all; every stroke starts with dipping the bristles into a water container and then into paint.
This single mechanical difference shapes almost everything else about how each brush behaves. Water brushes reward artists who like to control pressure with their fingers, since squeezing the barrel is what regulates how much moisture reaches the tip. Regular brushes reward artists who like to manage water visually, judging how much liquid and pigment sits on the bristles before the brush ever touches the page. Both approaches call for different habits, and understanding that early on saves a lot of frustration during those first few painting sessions.
How a Water Brush Works
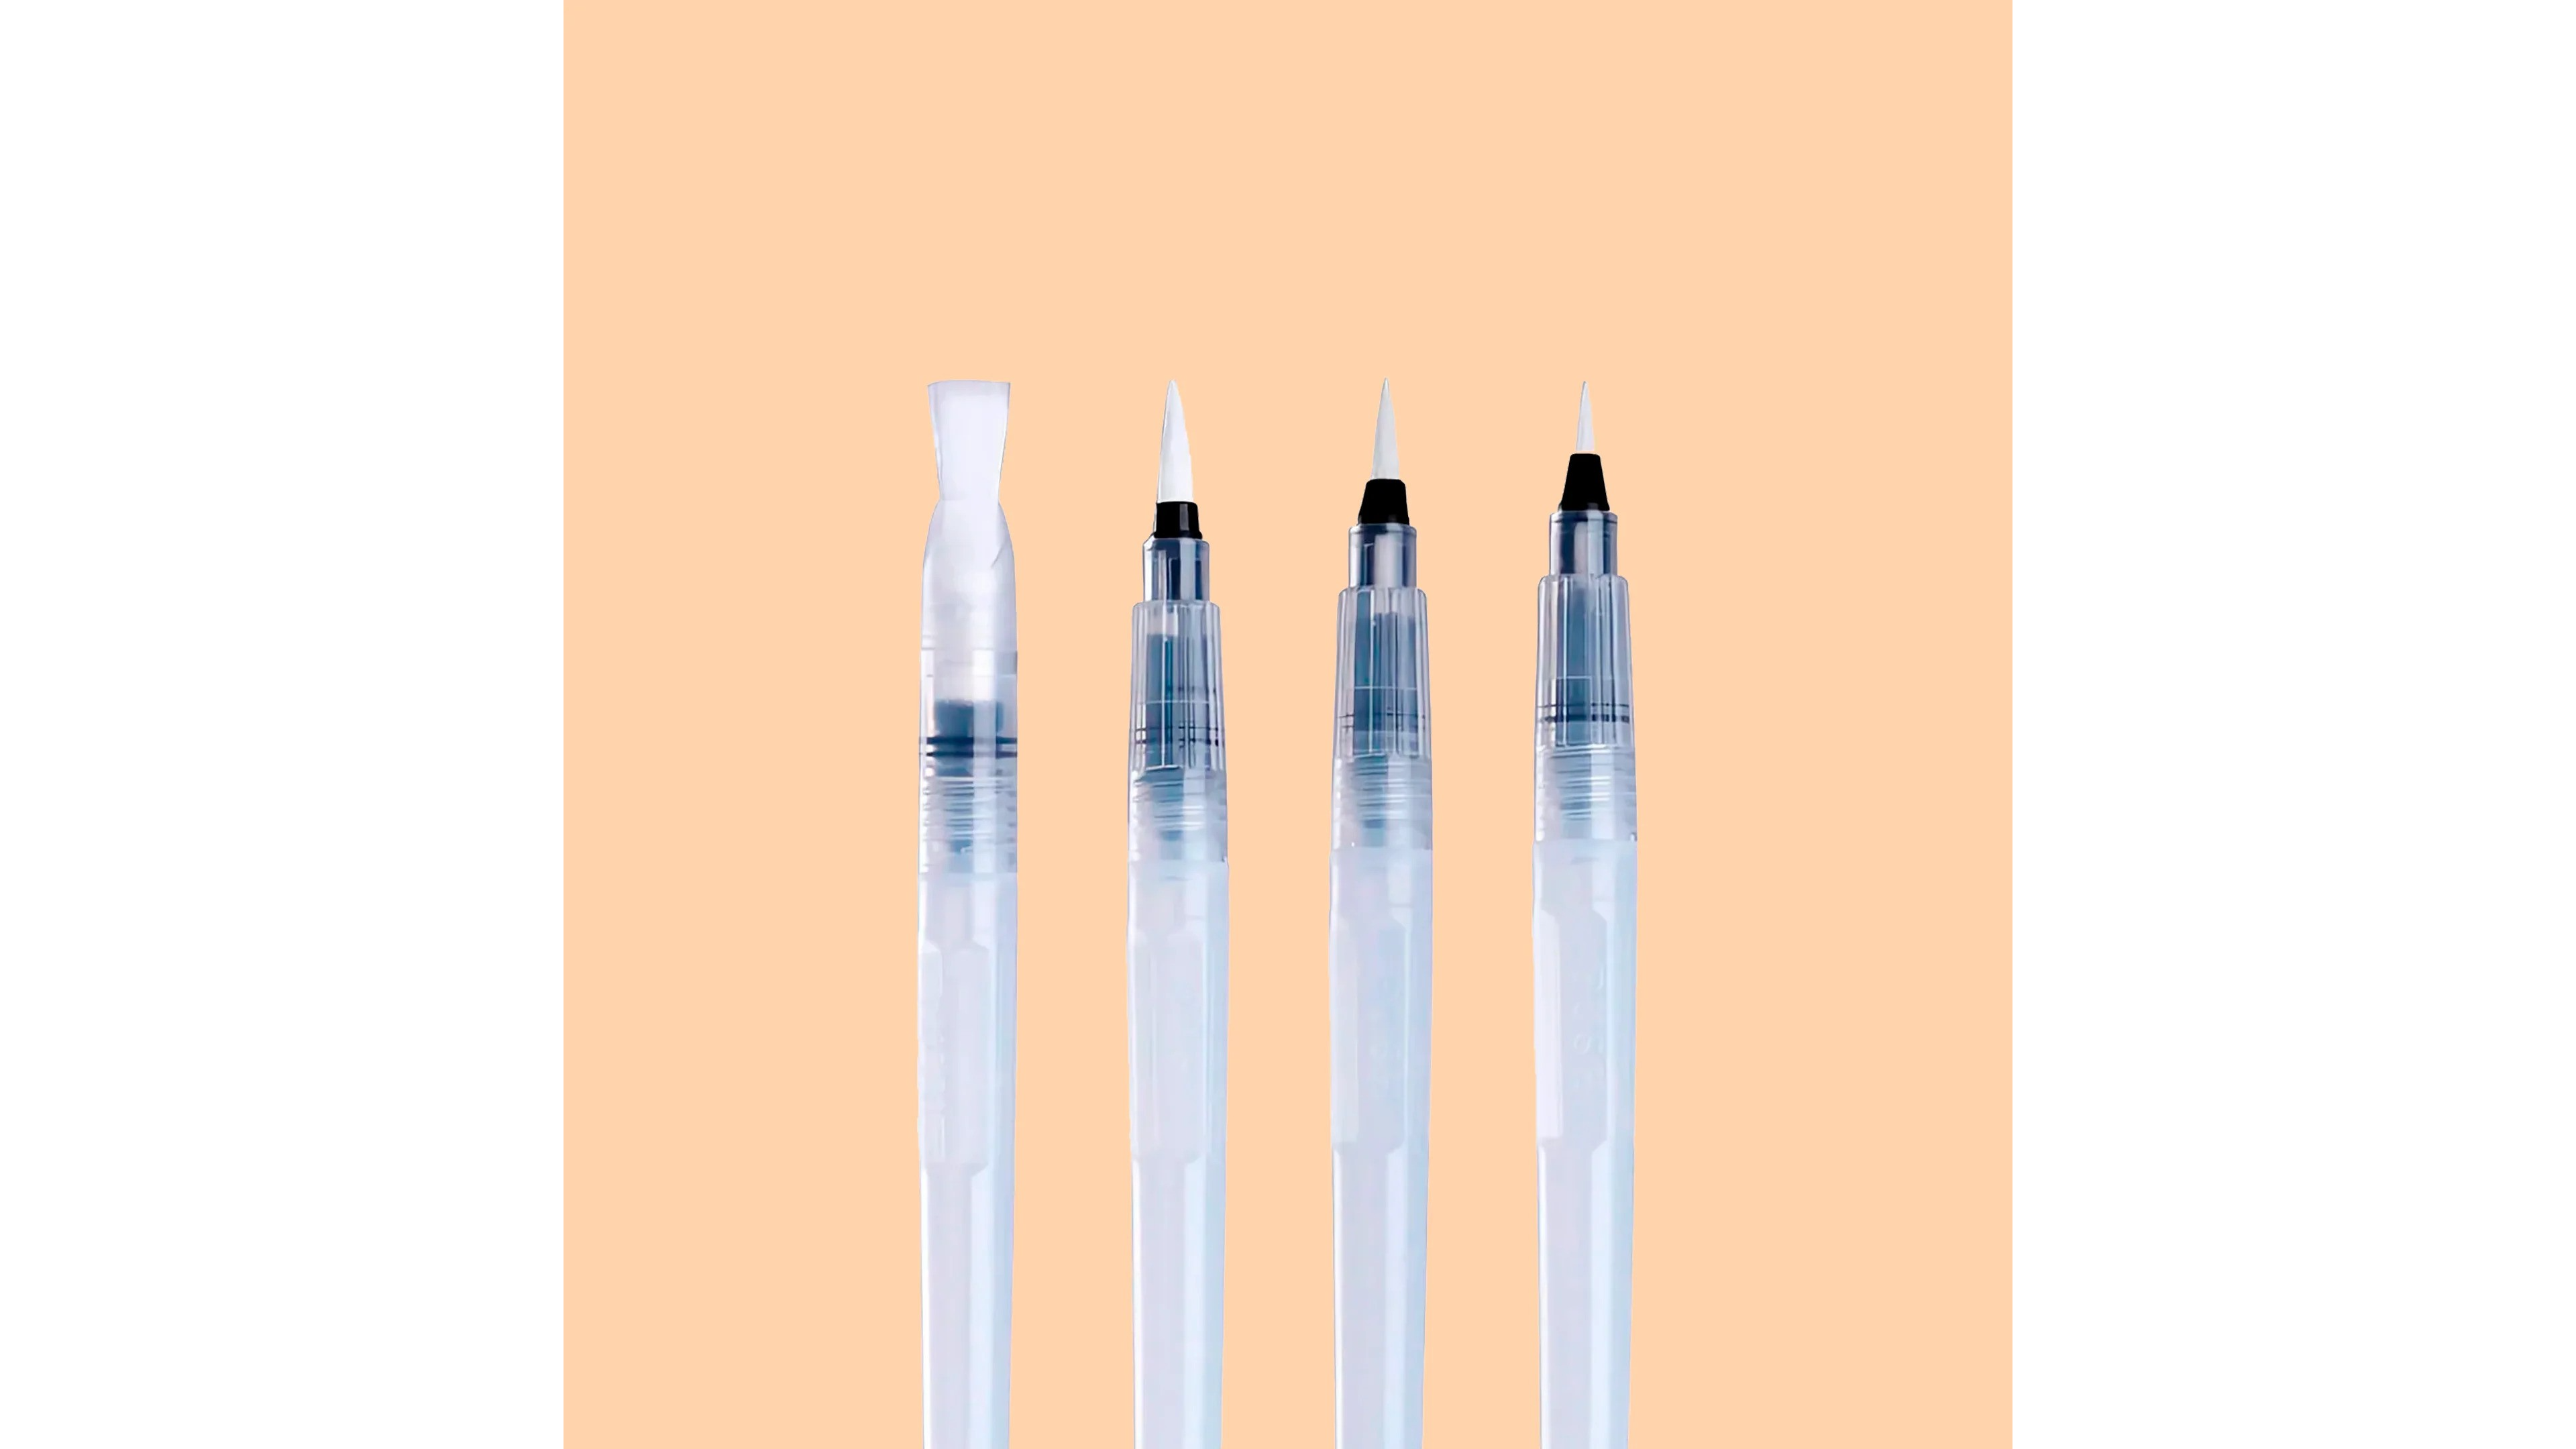
A water brush, sometimes called an aqua brush, is built with a hollow plastic handle that acts as a small reservoir. Fill that handle with clean water, and a gentle squeeze pushes moisture through soft synthetic nylon bristles, letting the brush paint without ever touching a water cup. Surface tension keeps the water inside the bristles until pressure or contact with the paper releases it, which is why the water does not just drip out on its own. Round tips are by far the most common shape, and a medium round size tends to handle the widest range of beginner tasks, from loose washes to simple line work.
Filling and Using the Barrel
Getting started with a water brush only takes a few steps, and once the rhythm clicks, it becomes second nature.
- Unscrew the barrel and fill it with clean water, then screw it back into place.
- Give the barrel a gentle squeeze until a small bead of water appears at the brush tip.
- Touch the damp bristles to a watercolor pan to pick up pigment.
- Paint the stroke, adding a light squeeze mid-stroke if more water is needed.
- To switch colors, squeeze water through the bristles onto a cloth until it runs clear.
That last step matters more than beginners expect, since clean bristles keep colors from muddying together on the page.
The Over-Squeezing Mistake to Avoid
The most common misstep with a water brush is pressing too hard on the barrel. A heavy squeeze floods the bristles with far more water than a stroke needs, and that extra liquid often turns into puddles or unwanted blooms on the paper. Most of the water a stroke requires transfers naturally once the brush is loaded from the pan, so a lighter touch usually works better than instinct suggests. Practicing a few strokes on scrap paper before starting a real piece is a simple way to get a feel for how much pressure produces the right amount of flow.
How a Regular Watercolor Brush Works
A regular watercolor brush follows the traditional format: a cluster of natural or synthetic bristles set into a metal ferrule, attached to a wooden or plastic handle. There is no reservoir here, so every stroke depends on dipping the brush into water and then into paint. This setup asks for a little more equipment on the table, but it also opens the door to a far wider range of bristle shapes and techniques than a water brush can offer.
Choosing Shapes and Bristle Types
Shape and bristle material both affect how a regular brush performs, and beginners benefit from knowing the basics before buying one.
- Round brushes handle everything from fine lines to medium washes, and a size 6 or 8 round is often recommended as a flexible starting point.
- Flat brushes lay down even washes across larger areas, which makes them useful for skies and backgrounds.
- Mop brushes hold a large amount of water, making them well-suited to loose, flowing backgrounds.
- Natural kolinsky sable bristles hold a sharper point and carry more water, thanks to tiny scales on the hair surface.
- Synthetic bristles cost less and still perform reliably, which makes them a practical choice while skills are developing.
Core Strokes and Techniques
Once the right brush is in hand, a handful of core techniques cover most of what a beginner needs to practice.
- Wet-on-wet: wet paint applied to wet paper, producing soft, blooming edges.
- Wet-on-dry: wet paint applied to dry paper, producing crisp, controlled edges.
- Dry brush: very little water loaded onto the bristles, producing textured, broken strokes.
- Glazing: thin, transparent washes layered one on top of another once each layer dries, building depth over time.
Rinsing and blotting between colors keeps these techniques clean, and using two water cups, one for rinsing and one for mixing, helps prevent colors from turning muddy.
Water Brush: Pros and Cons
A water brush earns its popularity through convenience, but it does ask for a few trade-offs in return.
Pros:
- Self-contained design means no water cup is needed, which suits travel and outdoor sketching.
- Switching colors is quick, just a squeeze and a wipe.
- Works well for softening and activating hard pan paints.
- Lower risk of knocking over a water container mid-session.
- Lightweight and easy to pack into a bag.
Cons:
- Water control is limited, so over-saturation can happen without much warning.
- Dry brush texture is harder to achieve since the bristles tend to stay moist.
- Shape options are narrow, since most water brushes come as rounds.
Regular Brush: Pros and Cons
A regular watercolor brush trades some convenience for precision and range, which many beginners find worthwhile as their skills grow.
Pros:
- Full water control, since the load is decided fresh with every dip.
- A range of shapes, from fine rounds to broad flats, supports a bigger range of marks.
- Better suited to dry brush work and fine detail.
- Widely available at art stores across a range of budgets.
Cons:
- Requires a fuller setup, including a water cup, palette, and paper towels.
- Less convenient for spontaneous outdoor painting sessions.
- Needs more careful cleaning and storage to protect the tip shape.
- Depends on having a water source close by, since it holds no water of its own.
Which One Fits Your Painting Style?
Some beginners lean toward spontaneous, on-the-go creativity, sketching during a commute or adding color to a travel journal between stops. For that style, a water brush removes almost every barrier to getting started, since there is no cup to carry and barely anything to clean up afterward. Others prefer a steady setup at a table, working through detailed studies or large washes where full water control matters more than convenience. That style tends to favor a regular brush, since the range of shapes and the ability to fine-tune water-to-paint ratio support more precise mark-making.
Many artists eventually keep both on hand, reaching for a water brush during quick studies or travel and switching to a regular brush for detailed studio work or large background washes. There is no need to settle on one tool forever; trying both early on is often the fastest way to find which habits feel most natural.
The Right Brush Depends on How You Paint
Neither brush style is inherently better suited to beginners, since the right choice depends on where and how painting actually happens day to day. A water brush suits anyone drawn to painting on the move, without a table, cup, or sink nearby, while a regular brush suits anyone settling in at a desk with water and supplies close at hand. For example, water brushes by Tobio's Kits hold their own water supply and come in a range of sizes, giving beginners who want that portable option a simple way to start painting without extra gear.
Testing both styles on a few practice pages is one of the easiest ways to see which pressure control feels more natural, squeezing a barrel or dipping into a cup. For anyone ready to get started with minimal setup, consider a portable watercolor kit that bundles brushes, paints, and paper together as a viable next step.
Tobio's Kits
City: Fort Lauderdale
Address: 3833 Powerline Road
Website: https://tobioskits.com/
Phone: +1 (305) 257-6512
Email: info@tobioshop.com


Comments
Post a Comment